Наш постоянный читатель Serg столкнулся с такой проблемой при загрузке Windows 8.
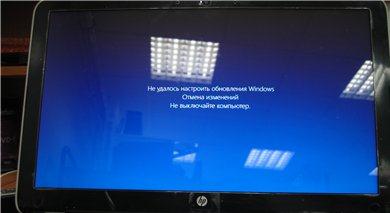
Вы не сталкивались с такой проблемой? Есть идеи, как мне быть? Очень уж не хочется винду переустанавливать.
Итак, в этой статье мы попробуем обобщить опыт, полученный в результате решения проблемы на ноутбуке Serg-а и опыт других счастливчиков, столкнувшийся с подобной проблемой.
Судя по тексту сообщения, по каким то причинам Windows 8 не смогла корректно установить обновления (в случае Serg-а, из-за отключения электропитания). В результате чего при следующей загрузке, «умная» система решает, что ее падение вызвано проблемой в одном из установленных обновлениях и пытается их откатить, но по почему-то не может этого сделать. Как следствие загрузка компьютера с Windows 8 / Windows Server 2012 останавливается на экране с надписью:
На английском ошибка выглядит так:
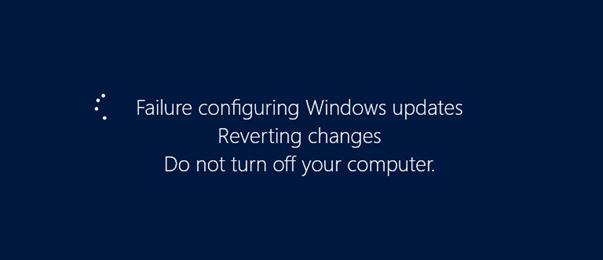
В некоторых случаях действительно стоит подождать несколько минут/часов, после чего система сама корректно откатит последние обновления. Но нередко случается, что эта надпись появляется при каждой загрузке и как-то убрать ее и нормально зайти в систему становится невозможно.
Вообще, данную проблему Microsoft описала в одной из статей своей базы знаний — http://support.microsoft.com/kb/949358. В статье в качестве возможных методов «лечения» предлагается выполнить такие операции (последовательно, начиная с первой, переходя к следующему решению, если предыдущее не помогло):
- Перезагрузите компьютер
- Отключите от компьютера все съемные носители и внешние жестки диски, и вновь перезагрузитесь
- Проверьте систему утилитой Windows Update Troubleshooter
- Воспользуйтесь функционалов восстановления системы (загрузка с установочного/загрузочного диска и откат к одной из предыдущих точек восстановления)
- Сбросьте Windows 8 через функции Refresh или Reset
- Переустановите ОС
1 и 2 способы в дополнительных комментариях, думаю, не нуждаются. Их стоит попробовать в первую очередь.
Windows Update Troubleshooter
Касательно 3 способа – запустить утилиту диагностики обновлений Windows 8 можно только из работающей системы, но так как она не грузится, попробуем выполнить такую проверку в безопасном режиме.
Для этого нужно загрузиться с загрузочного или установочного диска / флешки для Windows 8. Затем нам нужно запустить командную строку. Если используется установочный диск с Windows 8, проще всего это сделать, нажав на экране выбора языка/раскладки системы комбинацию клавиш Shift+F10.
В командной строке выполним
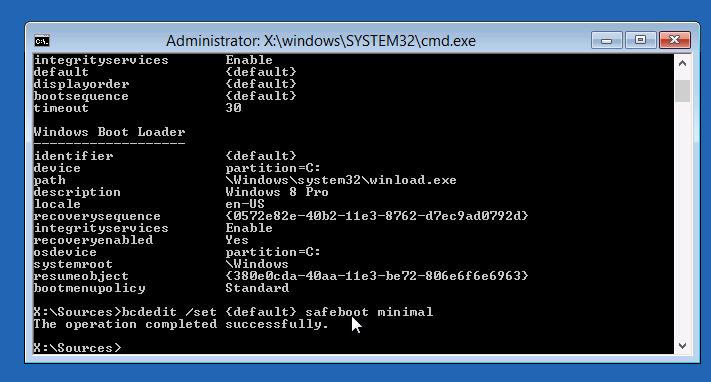
После следующей перезагрузки компьютер должен загрузиться в безопасном режиме.
Запускаем мастер диагностики службы обновлений, выполнив команду:
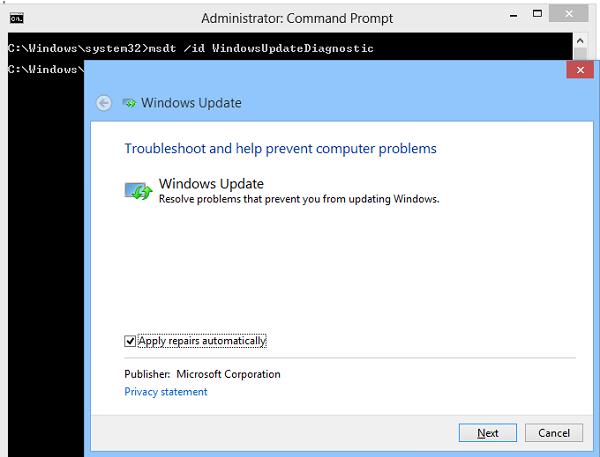
Затем просто следуйте инструкциям мастера.
После окончания работы мастера отключаем загрузку Windows 8 в безопасном режиме:
Перезагружаем систему и пытаемся загрузится в обычном режиме. Если не помогло, переходим к следующему способу.
Восстановление системы
Если применимо, попытайтесь выполнить восстановление системы, загрузившись с загрузочного/установочного диска и проверить, исчезнет ли проблема.
Если и это не помогло, а переустанавливать / сбрасывать Windows ох как не хочется, попробуйте сначала такие мотодики.
Очистка кэша обновлений
Опять загружаемся в безопасном режиме (описано выше), открываем командную строку и выполняем очистку содержимого папки C:WindowsSoftwareDistributionDownload (именно в эту папку Windows закачивает обновления и отсюда начинает их установку)). Сделать это можно прямо из проводника или такой командой:
Отключаем автоматический старт службы Windows Update:
Проверяем загружается ли Windows 8 в обычном режиме, если да, включаем автостарт службы обновлений и запускаем ее:
Система должна заново закачать обновления и установить их.
Если не помогло, идем дальше
Восстановление хранилища компонентов Windows 8
Попытаемся восстановить хранилище компонентов Windows 8 с помощью DISM. Для этого опять загружаемся в безопасном режиме и в командной строке последовательно выполняем команды:
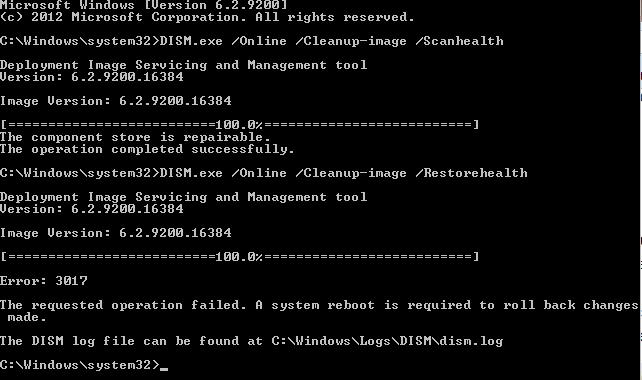
Отключаем загрузку в Safe Mode и проверяем, грузится ли Windows 8 в обычном режиме.
Если и это не помогло, и надпись «Настройка обновлений Windows. Возврат изменений» не пропадает, вероятно, стоит подумать о сбросе или переустановке системы…
By Tina | Follow | Last Updated June 13, 2019
Summary :
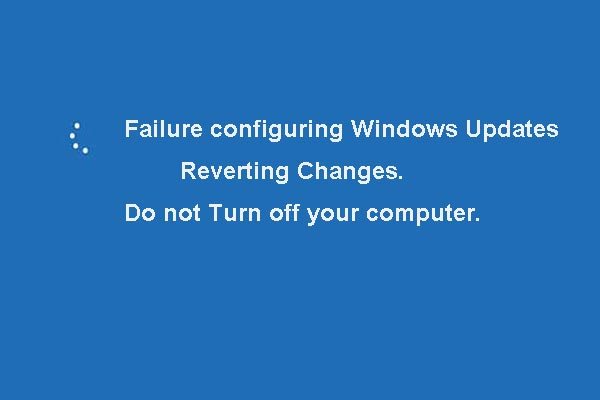
Failure configuring Windows updates reverting changes may occur while updating Windows 10. This article will show you how to fix this Windows updates failed reverting issue using 5 methods. Keep on reading to get more information.
Failure Configuring Windows Updates Reverting Changes
When you are trying to install Windows update, you may get the issue failure configuring windows updates reverting changes takes too long windows 7 shown below:
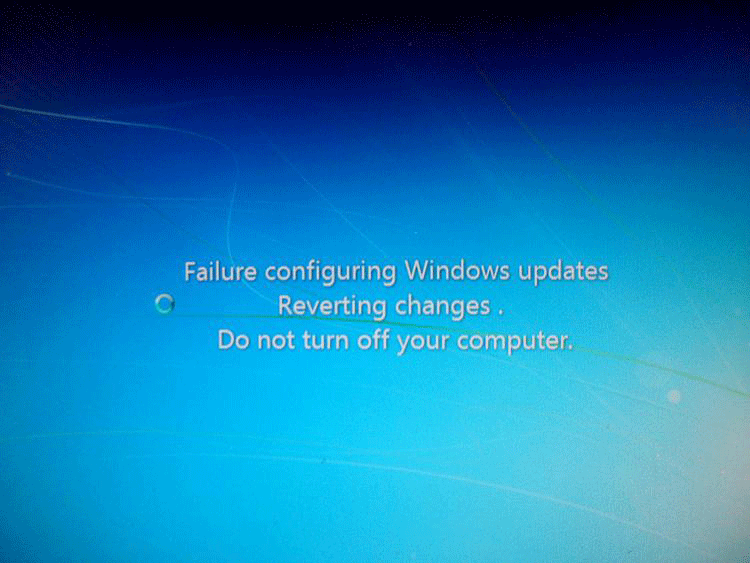
Then do you know how to fix failure configuring Windows updates reverting changes problem?
Before diving into the fixes for this issue, there is one important thing you need to pay attention to. Although updating Windows may introduce new features to the OS and fix some bugs, it may also lead to problems such as data loss and Windows does not boot after updating, etc.
What to Do before Updating Windows?
Before updating Windows, it is recommended to create a system image so your data gets well protected and your computer can be restored to the previous working state lest accidents happen.
To back up the operating system, we recommend the Windows backup software — MiniTool ShadowMaker. It is a professional backup tool that can back up the operating system, files and folders, partitions and disks.
MiniTool ShadowMaker is also a piece of file sync software which can help you to sync files to two or more locations so as to keep data safe.
It also plays an important role in restoring and recovery actions when accidents occur.
Therefore, for safeguarding your PC and data, it is best to create a system image before updating. Download MiniTool ShadowMaker Trial from the following button or purchase the advanced one .
Here we will show you how to back up the operating system.
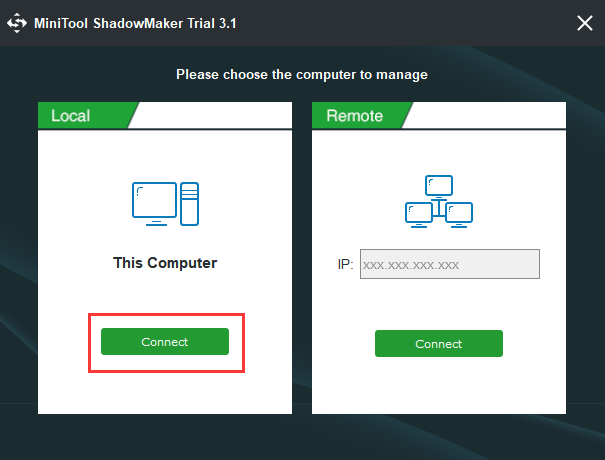
Step 1: Install the backup software and launch it. Click Keep Trial to continue. Then click Connect in This Computer to enter its main interface.
Step 2: If no backup image is created on this PC, click SET UP BACKUP button in the Home page to continue. By default, the operating system is selected as the Source while the Destination is selected automatically.
Meanwhile, you can also click the Backup in the toolbar to enter the backup page. Then click Source and Destination tabs to choose what you want to back up and where you want to save the backup image.

Step 3: Perform the backup actions by clicking Back up Now button. Or click Back up Later to delay the backup action. Then the backup task can be seen in the Manage page.
Step 4: After the backup has finished, go to the Tools page to create a bootable disc or a USB flash drive so you can boot your computer from it to enter MiniTool Recovery Environment and perform some recovery actions
After the system image has been created, you can update Windows. Even if you encounter the issue failure configuring Windows updates reverting changes, you can use the system image to roll back to the previous working state.
Besides the backup feature, the Disk Clone feature of MiniTool ShadowMaker can also help you to safeguard your PC and data.
How to clone hard drive or migrate OS to SSD without data loss? MiniTool provides two pieces of best free SSD cloning software.
Now we will show you how to fix failure configuring Windows updates reverting changes problem.
5 Ways to Failure Configuring Windows Updates Reverting Changes
Solution 1: Unplug Your Removable Media from the Computer
Removable media might be causing the issue failure configuring Windows updates loop.
Check if any removable media is connected with your computer, such as the USB flash drive, memory card, then unplug them and try updating Windows again.
Solution 2. Run Windows Update Troubleshooter
Now, go on to the second method. The error failure configuring Windows updates loop may be caused by Windows update. Thus, run Windows Update Troubleshooter to fix the problem. The detailed operations are as follows.
Step 1: Download Windows Update Troubleshooter from Microsoft. Although Windows includes a built-in troubleshooter, the one from Microsoft Support includes more fixes.
Step 2: Click Next to run this tool and start troubleshooting the problems preventing you from updating Windows.

Step 3: Click Try troubleshooting as an administrator to continue.

Step 4: Click Next and wait for problems to be detected. Then click Apply this fix to continue.
Step 5: Troubleshooting may take some time. When it is finished, you can restart your computer and try running Windows Update again to check whether the issue failure configuring Window updates reverting changes loop is solved.
Solution 3. Install Windows Update in Clean Boot State
Some service or functionality of Windows might cause the issue failure configuring Windows updates reverting changes as well. Thus, you can try to solve this issue by installing Windows update in clean boot state, where only the essential service and functionality are running.
Step 1: Log on your computer as the administrator. Press Windows key and R key together to open Run dialog box. Type msconfig in the box and click OK to or hit Enter to continue.

Step 2: In the popup window, go to the General tab and select the Selective startup. After that, uncheck the Load startup items to continue.

Step 3: Go to the Services tab and check the option Hide all Microsoft services. Then click Disable all. Finally, click OK to continue.

After that, your computer will restart in a clean boot state. Then you can update Windows again and check whether the issue is solved.
Solution 4. Delete Windows Update Cache
Windows update cache might cause failure configuring Windows updates reverting changes, so here we will show you how to clear the Windows update cache and solve the Windows update failed issue.
Step 1: Press Windows key and R key together to launch the Run dialog. Then type services.msc in the box and click OK or hit Enter to continue.

Step 2: Find Windows Update from the list of services and double-click it.

Step 3: Stop this service by clicking Stop button. Click OK to continue.

Step 4: Return to the service window. Find Background Intelligent Transfer Service and double-click it to stop the service in the same way.

Step 5: Minimize the service windows.
Step 6: Open Windows File Explorer by pressing Windows key and E key together and navigate to the following in the picture. Next, delete all files under this folder.
C:WindowsSoftwareDistributionDownload

Step 7: Go back to the Service window, find Windows Update and double-click it. Then restart the service by clicking the Start button. Click OK to go on.
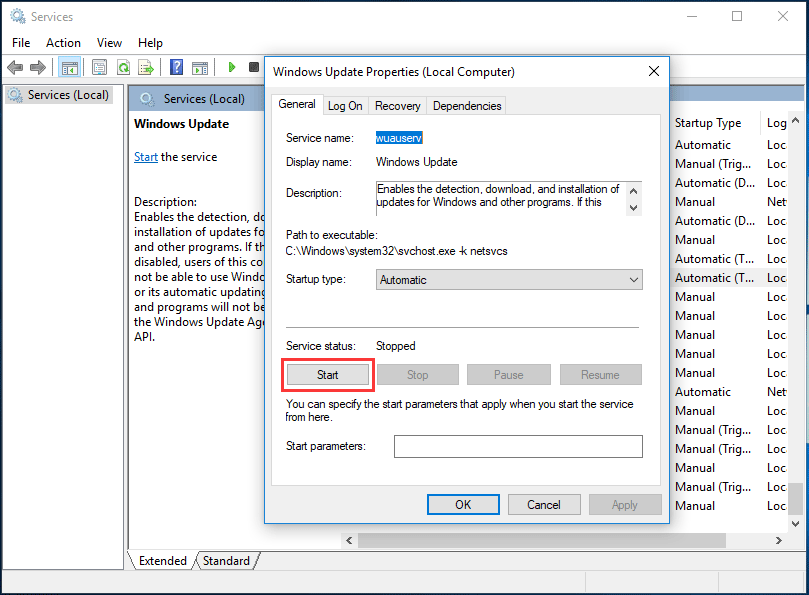
Step 8: Restart the Background Intelligent Transfer Service in the same way.
After you have finished all the steps, restart your computer and run Windows update again to check whether the update configuration issue has been solved.
Solution 5. Perform a System Restore
If the failure configuring Windows updates reverting changes issue is still occurring even after all the above methods, you can try performing a system restore.
Here is how to perform a system restore with the restore point you created before.
What is a system restore point and how to create restore point Windows 10? This post will show you the answers.
Step 1: Type create a restore point in the search box of Windows 10. Select it to continue.
Step 2: Go to the System Protection tab and click System Restore.

Step 3: In the popup window, click Next.
Step 4: Now, you can see your previously created restore points listed here. Select the point you want to restore to and click Next. If there are several restore points, you can choose any one based on the created time or the description.
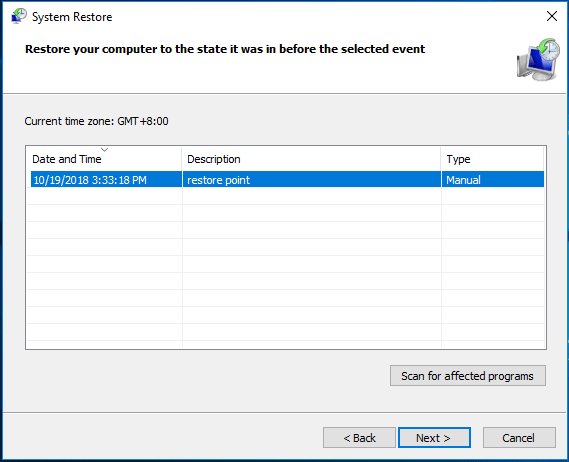
Step 5: Confirm the restore point and Finish.
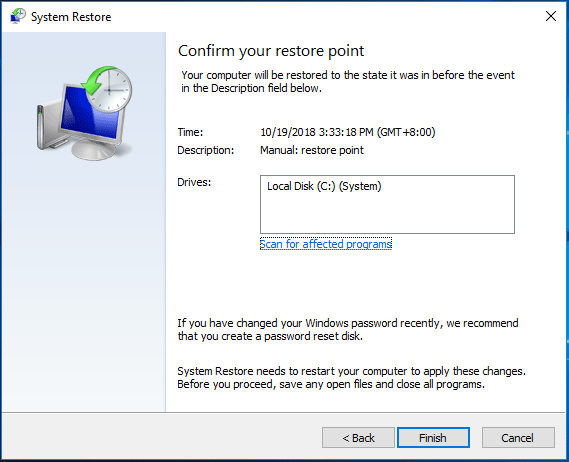
When the system restore process is finished, you can try to restart your computer and check whether the issue Windows update failed is solved.
In addition, we have mentioned a professional backup tool – MiniTool ShadowMaker in the beginning. It can also help you to restore your computer to an earlier date with the backup image you have created before.
Moreover, from this solution, you can know that it is pretty important to create a system image to protect your PC and data well.
If you haven’t created a restore point, you can try to reinstall the operating system by using a Windows installation media like a Windows DVD or a USB drive so as to solve the Windows update reverting changes issue. Before reinstalling the operating system, it is best to back up all your important files so as to avoid data loss.
Bottom Line
We have introduced 5 methods to fix the problem Windows reverting changes due to failure to configuring updates. You can try using one of them to solve the Windows update failed problem.
If you have any better solution, you can share it on the comment zone. If you have any problem with MiniTool Program, feel free to contact us via the email [email protected] and we will reply you as soon as possible.
In the versions of Windows Vista, 7, and 8, sometimes the updates lag, and you see a “Failure configuring Windows updates Reverting changes” error. This error frequently appears when people attempt to upgrade to newer versions of Windows (especially on Windows 8, which had a short lifespan and is no longer supported by Microsoft).
If you are experiencing this problem, continue reading to find out how to resolve it. If you have Windows 10 and are experiencing updates that are not installing correctly, you can look here to find the answer.
What Causes Windows Update to Fail When Configuring Updates?
During an update, many things can cause Windows to freeze. On earlier Windows systems when this happened, the operating system tries to roll back to the way Windows was before the update. That is what happens when you see this screen.
Updates can fail for a variety of reasons. Some of these include the following:
- The software you have already installed on your computer is not compatible with the update.
- The update itself causes an issue that did not occur during testing.
- Removable media is interfering with the way your computer restarts.
- Too many updates are trying to load at once.
In some cases where automatic updates are on, the “Failure configuring Windows updates Reverting changes” error can create a reboot loop that is very discouraging. Help is here! Keep reading to resolve this issue on your Windows Vista, Windows 7, or Windows 8 computer.
Ending the Failure Configuring Windows Updates Reverting Changes error
Fix 1: Wait It Out
Waiting it out is the best thing to try first. If there were numerous updates or if some of the updates were large, it can take a long time to finish reverting the changes and download them again. It is best to allow your computer to sit for at least 10 hours without pressing buttons or trying to restart it. Even in the best of conditions, this error will take a minimum of thirty minutes to resolve itself.
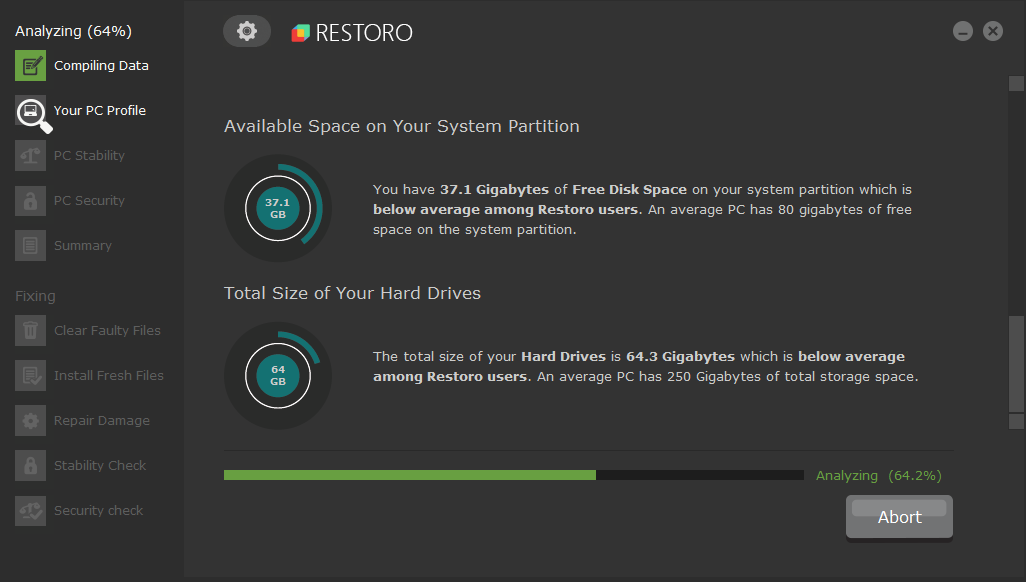
Fix 2: Use the Advanced Repair Tool (Restoro)
Sometimes issues with Windows 10 are caused by corrupted Windows files. We recommend using Restoro to find and automatically resolve the issues that are causing Windows to not complete its updates.
Step#1
Step#2
Accept the license terms by checking the “I Accept the EULA and Privacy Policy” to continue.

Step#3
You can view the details of the scan by expanding the “Details” tab.
Step#4
To set an action, expand the “Recommendation” tab to either choose “clean” or “ignore.”
Step#5
Click on “Clean Now” at the bottom of the page to begin the cleaning process.
Fix 3: Remove all removable memory cards, disks, flash drives, etc.
Although removable media does not create a problem with the update, it does cause a problem during the system restart where the updates are installed.
Check the disk drives, USB ports, and memory card slots for any removable media such as SD cards, flash drives, CDs, and DVDs. If you don’t find any, you can continue to the next method. If you do find something, proceed to Step #2.
Shut down the computer if it is not already shut down. You may have to perform a hard shut down by holding down the power button for thirty seconds.
Remove the media from the computer. For memory cards and USB drives, you can pull them out as soon as the computer is completely off. If you need to remove a disk with the computer off, you insert the unfolded end of a paper clip into the manual disk eject hole. This is a tiny hole located somewhere on the front of the disk player. Examples can be seen in the following pictures.


Step #4
Once the media is removed, start your computer and see if the updates install correctly.
Fix 4: Use the Windows Update Troubleshooter
The Windows Update Troubleshooter by Microsoft is an app that finds the exact problem with an update and fixes it. To use the Troubleshooter, you must first download it for Windows Vista or Windows 7 or 8. Make sure you only download it from the official Microsoft website.
Step #1
Visit Microsoft’s website here and click the blue highlighted “Fix it” under the appropriate version of Windows you are running.
Step #2
Choose “Run” when the popup asks if you want to save or run the file. This should automatically open the Troubleshooter.
Step #3
Follow the onscreen prompts to run the Troubleshooter. It will automatically detect any update problems and fix them.

If the Troubleshooter cannot detect any problems or if after fixing the issues detected you still have trouble with the update and see the “Failure configuring Windows updates reverting changes” error, continue to another method to resolve the issue.
Fix 5: Do a Clean Reboot
Sometimes third-party apps might be interfering with the download. If this is the case, restarting the computer without these apps running should resolve the matter.
Log into an administrator account. If at any time during the following steps you are asked for your password, type in the password for this administrator account. Press the [R] key and the [Windows] key at the same time. This opens the Run box. Type “msconfig” into it without quotation marks. Click the “OK” button.

When the System Configuration window opens, click on the services tab and make sure that “Hide all Microsoft services” has a check mark next to it. Click the button to “Disable all.”

If you have Windows 7 or Vista, skip this step and go to Step #4. In Windows 8, click the “Startup” tab in the System Configuration window. Then click on “Open Task Manager.” When the Task Manager opens, click the “Startup” tab in that, and select each item you find there and click the button to “Disable” it if it isn’t already disabled. When you are finished, close the Task Manager.

Step #4
If you have Windows 8, skip this step and go to Step #5. In Windows 7 or Vista, click the “General” tab in the System Configuration window. Choose “Selective startup.” Now make sure there isn’t a checkmark in the box next to “Load startup items.”

On the System Configuration window that is still open, click the “Apply” button and then “OK.”
Click on the Power icon and choose “Restart” to restart the computer.
Once the computer restarts, attempt to rerun the updates. In Windows 8, you do this by opening the Start Menu, selecting “Settings” and then Change PC Settings. Then choose Update and Recovery, and Windows Update. Finally, click the “Install Updates” button. In Windows 7 and Vista, open the Start Menu, type “Update” in the search box, and choose “Windows Update.” Again, click the “Install Updates” button.
With a clean reboot, you should be able to install the updates normally, as long as a third-party app was interfering with them and causing the “Failure configuring Windows updates Reverting changes” error.
Fix 6: Install the Updates in Safe Mode
In some cases, Microsoft’s apps may be interfering with the updates. Installing updates in Safe Mode ensures that only the necessary programs are running in the background.
Step #1
If the loop is continuous and you cannot access your computer, press F8 during the reboot and select “Safe Mode with Networking” when prompted. If you can get to your computer desktop, press the [R] key and the [Windows] key together to open the Run box. Type “msconfig” into it without quotation marks and click “OK.”
Go to the “Boot” tab in the System Configuration Window that opens. Make sure the box next to “Safe Boot” is marked and choose “Minimal” underneath it. Now click “Apply” and then “OK.”

Step #3
Windows should ask if you want to restart your computer now. Click “Restart.”

Once you have restarted in Safe Mode, open the Start Menu and choose “Control Panel.”

When the Control Panel opens, select “System and Security” (or “Security” in some versions). Then click Windows Update to open that window. Find the button that says “Install updates” and click it.
When the updates finish installing, you should restart your computer. Because the settings have been changed, it should automatically restart in Safe Mode. Once it does, press the [R] key and the [Windows] key together again to open the Run box. Then, you can type “msconfig” into it without quotation marks into the box and click “OK” as you did before.
Return to the “Boot” tab in the System Configuration Window. This time, uncheck the box next to “Safe Boot.” Click “Apply” and then “OK.” Again, restart your computer.

With the updates applied in Safe Mode, you should have no problems restarting your computer. If the “Failure configuring Windows updates Reverting changes” error continues to appear, go to the next method.
Fix 7: Break the Updates Into Smaller Groups
Sometimes you get stuck in the loop because there are so many updates in the queue it takes too long to download them all at once. To fix this problem, you need to install the updates manually in smaller groups.
If the loop is continuous and you cannot access your computer, press F8 during the reboot and enter Safe Mode when prompted. Follow the instructions in method 5 to ensure your computer continues rebooting into Safe Mode throughout this process.
Step #2
Once you are in Safe Mode, open the Start Menu and click on the “Control Panel” option.
Step #3
Choose “System and Security” in the Window that opens. (This is just called “Security” in Vista.) Now click on “Windows Update.”

Step #4
In the drop-down menu under “Important Updates,” select “Check for updates but let me choose whether to download and install them.” Make sure the box under “Recommended Updates” has a check mark in it. None of the other boxes should be marked. Now click “OK.”

Return to the main Windows Update page. This time click on the blue words telling you the number of significant updates available.

You should see a list of updates. Make sure only a few are selected and click “Install.” It is best to choose the lowest numbered updates first since Microsoft expects them to be installed in order.

Step #7
Continue repeating steps #4 and #5 until all the critical updates have been installed. You can then repeat the process for optional updates if you want. When you have finished, reset the Windows Update settings to update Automatically.

Step #8
Restart your computer in Normal Mode.
This process is long, but it should resolve the “Failure configuring Windows updates reverting changes” error you have.
Fix 8: Run the System File Checker
Some files may become corrupt or damaged. The file checker will fix them for you so updates can continue normally.
In the Start Menu search bar, type “Command Prompt” without the quotations. Right-click the “Command Prompt” option that appears and choose “Run as administrator.” Depending on the version of Windows you are using, you may have to enter your password or click “Allow” to continue to the Command Prompt window.

Step #2
If you have Windows 7 or Windows Vista, skip this step and go to step 3. If you have Windows 8, you first need to run the DISM. To do this, you need removable media such as the Windows DVD that contains source material to repair the Updater. You can create this media from another Windows 8 computer that is not having the Failure configuring Windows updates error. Insert the media into the DVD player or the USB port (depending on what it is). Once the media is inserted, type “DISM.exe /Online /Cleanup-Image /RestoreHealth /Source:D:RepairSourceWindows /LimitAccess” into the command prompt without the quotation marks where D:RepairSourceWindows is the location of the uncorrupted Windows Updater files. Once you press enter, the repair should take place automatically, but it may take a little time.

Now, you need to check for other corrupt files you may have. To do so, type “sfc /scannow” into the Command Prompt or cut and paste it without the quotation marks. You will need to wait for the process to be 100% complete before closing the window and exiting the Command Prompt. Many messages could appear once the scan is complete. Windows may not find corrupt files or may automatically fix them. If the message says Windows could not perform the requested operation, you need to retry the scan in Safe Mode. In some cases, Windows may fix some of the files but be unable to correct others. If this happens, you may be able to access the log and replace the files that are corrupt with good copies.

Hopefully, repairing Windows Updater will resolve your Failure configuring Windows error. If not you can still try the next method.
Fix 9: Do a System Restore
In some cases, you may need to do a system restore using the Windows installation disk. Make sure you back up any files you have before you perform this method.
Log in as an administrator. If at any point during this process you are asked for your password, use the password for your administrator account. Place the Windows installation disk in the disk drive. Restart your computer and press any key when it asks if you want to start the computer using the disk.
If you have Windows 8, skip this step and go to Step #3. On Vista or 7, you will need to configure the installation language, currency and time format, and the methods of input (such as the keyboard). When you have finished, click “Next.”
Select the option to repair your computer.

Skip to Step #5 if you have Windows Vista or 7. In Windows 8, you need to choose Troubleshoot and “Advanced Options.”

Click “System Restore,” choose the restore point and click “Next” on Windows 8. For Windows 7 and Vista, click “Next,” “System Restore,” “Next,” choose your restore point and click “Next” again.

If you are asked which disk you want to restore, choose the hard disk. You may also need to confirm the restore point. When the restore is finished, you need to “Restart” your computer to apply the changes.

Fix 10: Do a System Installation
When all else fails, you may have to reinstall windows. Again, make sure you have completely backed up all your files before you begin.
Insert the installation disk in the disk drive. When the Setup window appears, choose “Install now.” Windows should automatically detect the disk. If it doesn’t, type “D:setup.exe” into the Start Menu Search bar, where D: is the drive where the disk is located. You should see “Setup.exe” in the list of programs that appear. Clicking on that will give you the option to “Install Now.” Clicking “Install Now” will rewrite your drive back to factory standards.

At this point, you will need to perform an extended amount of updates. It is best to install these updates in smaller groups as was done in Method 6 above. You may also need to do an Upgrade if you made any upgrades to newer versions of Windows. You will probably need to enter your product key at some point and agree to Microsoft’s licensing terms.

When you have finished upgrading and updating, you will need to restart the computer.
Conclusion:
These methods should have resolved your “Failure configuring Windows updates Reverting changes” error. If the error occurs again, you might want to try one of the additional methods to address it since each way fixes a different problem that could be causing the issue.