
User Tools
Site Tools
Table of Contents
В линейке WL-500g Premium выпущены две модели: ASUS WL-500g Premium , она же ASUS WL-500gP V1 , и ASUS WL-500gP V2 . У разных моделей разные процессоры.
ASUS WL-500gP является одним из лучших маршрутизаторов с Linux на борту: большие объёмы RAM и Flash, два порта USB 2.0 и быстрый процессор. В V1 есть miniPCI слот, который позволяет менять радиомодуль. В V2 убран miniPCI слот и полностью обновлена элементная база, которая стала компактней и с меньшим энергопотреблением.
Поддерживаемые версии
| Версия/Модель | S/N | Версия OpenWrt | Примечание |
|---|---|---|---|
| v1 | — | Backfire 10.03 и новее | Радиомодуль в miniPCI слоте, заменяем ; антенна слева (если смотреть с лицевой стороны) |
| v2 | — | Backfire 10.03 и новее | Большинство элементов встроены в SoC; антенна справа (если смотреть с лицевой стороны) |
Note: Релиз Chaos Calmer 15.05.1 нормально работает на обоих версиях маршрутизатора.
Note: Все старые сведения и остальные догадки и замечания вида “По-моему работает, но вот это не работает” читайте на английском.
Hardware Highlights
| версия | CPU | Ram | Flash | Сеть | USB | Serial | JTag |
|---|---|---|---|---|---|---|---|
| v1 | Broadcom BCM4704@264Mhz | 32MiB | 8MiB | 4 x 1 | 2x 2.0 | Yes | No |
| v2 | Broadcom BCM5354@240Mhz | 32MiB | 8MiB | 4 x 1 | 2x 2.0 | Yes | No |
Установка
Этот раздел содержит инструкции по установке и обновлению OpenWrt. Сначала мы даем ссылки на скачивание файлов, а ниже будет инструкция по установке.
Выбираем правильный образ
Backfire (10.03.1)
WL-500gP поддерживает 2 версии:
Attitude adjustment (12.09)
Chaos Calmer (15.05)
Chaos Calmer (15.05.1)
ASUS WL-500gP V1
ASUS WL-500gP V2
OEM простая установка
Начиная с OpenWRT Chaos Calmer 15.05 загружаем образ openwrt-*-brcm47xx-legacy-asus-wl-500gp-v?-squashfs.trx на странице обновления маршрутизатора, кликаем “Загрузить” и дожидаемся обновления странички.
Примечания.
OEM установка используя TRX
Не работает. Старый метод который практически не используется и утилиту нужно давно переписать (Sep. 1st 2007, confirmed by nbd on IRC ).
 does this still apply? — KanjiMonster 2010/04/11 13:13
TEST STILL FAILS on ASUS WL-500g Premium V2 with newest ASUS Firmware version 3.0.4.4 — porter 2011/04/28 00:18
TEST STILL FAILS on ASUS WL-500g Premium V1 with ASUS Firmware (not sure about the version) — sup 2012/05/05 20:22
OEM установка посредством TFTP
После установки прошивки адрес будет 192.168.1.1. В дальнейшем весь код будет относиться к IP 192.168.1.1
Для перевода маршрутизатора в диагностический режим:
Когда маршрутизатор находится в диагностическом режиме, можно установить OpenWrt, используя клиент TFTP .
NOTES:
Automated Ping and TFTP Script
ASUS firmware restoration tool (Windows only)
Если ваша ОС Windows, то это рекомендуемый для Вас метод. Утилита поставляется на диске с роутером, или на сайте производителя. Для обновления необходимо перевести роутер в диагностический режим.
Upgrading OpenWrt
If you have already installed OpenWrt and like to reflash for e.g. upgrading to a new OpenWrt version you can upgrade using the mtd command line tool. It is important that you put the firmware image into the ramdisk (/tmp) before you start flashing.
LuCI Web Upgrade Process
use correct URL
Terminal Upgrade Process
If this does not work (reboot without change) try using mdt. Make sure “linux” is the correct mtd target! (cat /proc/mtd). Tested with v1 models.
Hardware
| Version: | v1 | v2 |
| Architecture: | MIPS | MIPS |
| Vendor: | Broadcom | Broadcom |
| bootloader: | cfe | cfe |
| System-On-Chip: | Broadcom BCM4704 | Broadcom BCM5354 |
| CPU/Speed | BMIPS3300 V0.6 / 264 MHz | / 240 MHz |
| Flash-Chip: | EON EN29LV302B-70TCP Spansion S29GL064A90TFIR7 | Macronix 29LV640DB |
| Flash size: | 8 MiB | 8 MiB |
| RAM-Chips: | HY5DU281622FTP-5 / DDR-400 | |
| RAM size: | 32* MiB | 32 MiB |
| Wireless: | Broadcom BCM4318 802.11b/g (miniPCI) | Broadcom BCM43xx 802.11b/g (integrated) |
| Ethernet: | Robo switch BCM5325E | Switch in CPU |
| USB: | 2x 2.0 Via VT6212L | 2x 2.0 |
| Power adapter | 5V DC 2.5 A / UMEC UP0181B-05PE | |
| Serial: | Yes | Yes |
| JTAG: | No | Yes (pinout same as wrt54G) |
* some older models have only 16 MiB enabled.
Photos

With a Atheros Wistron CM9
MiniPCI WiFi card

With a Gigabyte GN-WIAG02 (168c:0013)
802.11abg MiniPCI WiFi card (Atheros AR5212) and 2nd antenna
Открытие корпуса
Note: Это действие лишает гарантии
Уберите 4 резиновые заглушки на ногах, под ними будет 4 винта откручиваем и поддеваем верхнюю крышку. Должна сниматься без особых усилий.
Последовательный порт
Последовательный порт готов к пайке (подгтовлен под 8-pin коннектор для подключения data-кабеля) в центре и правее верхней части. Смотри фото Если не понятно по фото то ниже будет распиновка (V1):
| RESET | |
| GND | 3.3V_OUT |
| UART_TX1 | UART_TX0 |
| UART_RX1 | UART_RX0 |
Pin 1 (with the square solder pad) is RX0.

Для (V2) tts/0 это J4 площадка под пайку:
| 3.3V_OUT |
| UART_RX0 |
| UART_TX0 |
| GND |
3.3V_OUT это вход рядом с подписью J4 и этот вход ближе к голотипу ASUS.
В V1 COM-порт CMOS уровня, поэтому Вам понадобится VCC, что бы прийти к стандартному COM. Параметры 115200 baud and 8-n-1.
Для подключени через COM V2, VCC Вам не нужен. TX COMa в UART_RX0 pin, RX COMa в UART_TX0 pin. Вот журнал загрузки через COM /backfire/10.03.1/brcm47xx/openwrt-brcm47xx-squashfs.trx
Buttons
The ASUS WL-500g Premium has two buttons. They are RESTORE and EZSETUP. The buttons can be used with hotplug events. E. g. [#wifitoggle WiFi toggle].
| BUTTON | Event |
|---|---|
| RESTORE | reset |
| EZSETUP | ses |
ACTION: released or pressed
Замена радиомодуля
Note: Только v1 !
Стандартный радиомодуль это MiniPCI карта BCM4318. Некоторые меняют эту карту на Atheros. Эта карта работает на драйвере с открытым исходным кодом, что позволяет работать на ядре 2.6 Для того что бы заменить карточку необходимо открыть роутер, отсоединить антенный кабель от карточки, аккуратно отогнуть две защелки и достать карту. После это го вся операция повторяется в обратном порядке с новой картой. Установите пакеты kmod-madwifi и hostapd-mini что бы добавить новый беспроводной адаптер.
Отредактируйте ваш /etc/config/wireless добавив в конце:
| config ‘wifi-device’ ‘wifi0’ option ‘type’ ‘atheros’ config ‘wifi-iface’ option ‘device’ ‘wifi0 ‘ |
Зайдите сюда там больше примеров.
После установки kmod-madwifi вы можете автоматически создать стандартный файл /etc/config/wireless для Atheros:
Specific Configuration
Interfaces
The default network configuration is:
| Interface Name | Description | Default configuration |
|---|---|---|
| br-lan | LAN & WiFi | 192.168.1.1/24 |
| vlan0 | LAN ports (1 to 4) | |
| vlan1 | WAN port | DHCP |
| wl0/ath0 | WiFi | Disabled by default |
Switch Ports (for VLANs)
Please note that the link between the physical ports and switch ports is different for v1 and v2 routers (see table below).
| Port | Switch port (v1) | Switch port (v2) |
|---|---|---|
| Internet (WAN ) | 0 | 4 |
| LAN 1 | 1 | 3 |
| LAN 2 | 2 | 2 |
| LAN 3 | 3 | 1 |
| LAN 4 | 4 | 0 |
| Internal connection | 5 | 5 |
5 is the internal connection to the router itself. Don’t be fooled: Port 1 on the v2 unit is number 3 when configuring VLANs. vlan0 = eth0.0, vlan1 = eth0.1 and so on. For v1 unit, WAN is switch port 0. LAN ports are switch ports 1,2,3,4. And LAN ports map exactly to switch ports.
Failsafe mode
If you forgot your password, broken one of the startup scripts, firewalled yourself or corrupted the JFFS2 partition, you can get back in by using OpenWrt’s failsafe mode.
Boot into failsafe mode
Активация всей RAM
*Note:* Это актуально только для WL-500gP v1.
На новых ASUS WL-500g Premium вся память активирована по умолчанию. Если вы посмотрите “dmesg | grep Memory”, то можете увидеть 16MiB of RAM. В спецификации указано 32MiB. Для активации 32MiB меняет sdram_init и sdram_ncdl NVRAM переменные на:
Basic configuration
Since this part is identical for all devices, see Basic configuration.
Connect stuff to the USB port
To connect stuff to the USB port, please see Connect stuff to the USB port, the package kmod-usb2 is needed. For some devices the package kmod-usb-uhci-iv might also be needed.
User Tools
Site Tools
Table of Contents
This device is NOT RECOMMENDED for future use with OpenWrt due to low flash/ram.
DO NOT BUY DEVICES WITH 4MB FLASH / 32MB RAM if you intend to flash an up-to-date and secure OpenWrt version (18.06 or later) onto it! See 4/32 warning for details.
1) This device does not have sufficient resources (flash and/or RAM) to provide secure and reliable operation.
This means that even setting a password or changing simple network settings might not be possible any more, rendering the device effectively useless. See OpenWrt on 4/32 devices what you can do now.
2) OpenWrt support for this device will end after 2019.
19.07 will be the last official build for 4/32 devices. After 19.07, no further OpenWrt images will be built for 4/32 devices. See OpenWrt on 4/32 devices what you can do now.
In the line WL-500g Premium produced a two models: ASUS WL-500g Premium AKA ASUS WL-500gP V1 and ASUS WL-500gP V2 . Different models with different processors.
The ASUS WL-500gP was one of best of the line Linux based router. It featured plenty of RAM and Flash, two USB 2.0 ports and a fast CPU. The model V1 also featured a miniPCI slot that allowed to change the wireless card. In V2 a newer SoC which integrates most components, but retained most features of the first version except the replacable wireless, which also got integrated into the SoC.
Supported Versions
| Version/Model | S/N | OpenWrt Version Supported | Model Specific Notes |
|---|---|---|---|
| v1 | — | Backfire 10.03 and newer | wireless in miniPCI slot, replacable; antenna on the left (from the front view) |
| v2 | — | Backfire 10.03 and newer | most features integrated in SoC; antenna on the right (from the front view) |
Note: The wireless in the v2 is a low power wireless PHY, which currently isn’t really supported by b43, therefore 2.4 is still recommended for the v2.
Note: As of r18801 in the 8.09 (kamikaze) branch, the wireless in v2 works fine even with the 2.6 kernel at least in the client mode — so if you do not need AP mode and need 2.6 kernel, v2 should be usable now. Other wireless modes were not tested.
Note: As of Attitude Adjustment 12.09-beta2 the v2 seems to work well, including the wireless.
Note: The release Chaos Calmer 15.05.1 works fine on both versions of the router.
Note: with the default factory firmware, it is possible to know what version you have by
Hardware Highlights
| version | CPU | Ram | Flash | Network | USB | Serial | JTag |
|---|---|---|---|---|---|---|---|
| v1 | Broadcom BCM4704@264Mhz | 32MiB | 8MiB | 4 x 1 | 2x 2.0 | Yes | No |
| v2 | Broadcom BCM5354@240Mhz | 32MiB | 8MiB | 4 x 1 | 2x 2.0 | Yes | No |
Installation
This section details what is required to install and upgrade OpenWrt. First we link to software that you should download before you start reading the instructions on how to install.
Choosing the right image
Backfire (10.03.1)
The WL-500gP is supported by two targets:
Attitude adjustment (12.09)
Barrier Breaker (14.07)
Chaos Calmer (15.05)
Chaos Calmer (15.05.1)
ASUS WL-500gP V1
ASUS WL-500gP V2
OEM easy installation
Does not work yet. The TRX utility needs a rewrite (Sep. 1st 2007, confirmed by nbd on IRC ). does this still apply? — KanjiMonster 2010/04/11 13:13 TEST STILL FAILS on WL-500g Premium V2 with newest ASUS Firmware version 3.0.4.4 — porter 2011/04/28 00:18 TEST STILL FAILS on ASUS WL-500g Premium V1 with ASUS Firmware (not sure about the version) — sup 2012/05/05 20:22
Begin from the release Chaos Calmer 15.05 upload the image openwrt-*-brcm47xx-legacy-asus-wl-500gp-v?-squashfs.trx on the “Firmware upgrade” page of the router and click “Download”. Next wait when the page will updated.
Notes
OEM installation using the TFTP method
To put the router in the diag mode, do this:
It responds to ping, so you can confirm that it is in diag mode and ready for the tftp by using “ping 192.168.1.1”.
It is possible to install OpenWrt using a TFTP client when the router is in diag mode.
NOTES:
Automated Ping and TFTP Script
ASUS firmware restoration tool (Windows only)
If you are on Windows it is recommended to use the ASUS firmware restoration tool to install OpenWrt. The ASUS firmware restoration tool can be found on the CD. Make sure the router is in diag mode.
If the firmware restoration tool can’t seem find your router even though you are certain that it is in diag mode, it may be because the restoration tool is not very smart about which network interface to use. Disable all network interfaces except for the correct (LAN ) network interface and try again.
Upgrading OpenWrt
If you have already installed OpenWrt and like to reflash for e.g. upgrading to a new OpenWrt version you can upgrade using the mtd command line tool. It is important that you put the firmware image into the ramdisk (/tmp) before you start flashing.
LuCI Web Upgrade Process
use correct URL
Terminal Upgrade Process
If this does not work (reboot without change) try using mdt. Make sure “linux” is the correct mtd target! (cat /proc/mtd). Tested with v1 models.
Hardware
| Version: | v1 | v2 |
| Architecture: | MIPS | MIPS |
| Vendor: | Broadcom | Broadcom |
| bootloader: | cfe | cfe |
| System-On-Chip: | Broadcom BCM4704 | Broadcom BCM5354 |
| CPU/Speed | BMIPS3300 V0.6 / 264 MHz | BCM3302 V2.9 / 240 MHz |
| Flash-Chip: | EON EN29LV302B-70TCP Spansion S29GL064A90TFIR7 | Macronix MX29LV640EBTI-70G |
| Flash size: | 8 MiB | 8 MiB |
| RAM-Chips: | HY5DU281622FTP-5 / DDR-400 | W9425G6JH-5 / DDR-400 |
| RAM size: | 32* MiB | 32 MiB |
| Wireless: | Broadcom BCM4318 802.11b/g (miniPCI) | Broadcom BCM43xx 802.11b/g (integrated) |
| Ethernet: | Robo switch BCM5325E | Switch in CPU |
| USB: | 2x 2.0 Via VT6212L | 2x 2.0 |
| Power adapter | 5V DC 2.5 A / UMEC UP0181B-05PE | 5V DC 2.5 A / UMEC UP0181B-05PE |
| Serial: | Yes | Yes |
| JTAG: | No | Yes (pinout same as wrt54G) |
* some older models have only 16 MiB enabled.
Photos
With a Atheros Wistron CM9
MiniPCI WiFi card
With a Gigabyte GN-WIAG02 (168c:0013)
802.11abg MiniPCI WiFi card (Atheros AR5212) and 2nd antenna
Opening the case
Note: This will void your warranty!
Remove the 4 nubs under the case, now you can see some screws. Unscrew them. You’re done. When you’re finished you can put the rubbers back into the gadgets. They’ll stick alone.
Serial
Serial is located on pin soldering points (ready for soldering of 8-pin connector for use with detachable cable) on the centre of the right upper side (viewing from front panel) under ventilation holes. At right from these points, you can see printed pin descriptions (V1):
| RESET | |
| GND | 3.3V_OUT |
| UART_TX1 | UART_TX0 |
| UART_RX1 | UART_RX0 |
Pin 1 (with the square solder pad) is RX0.
For (V2) tts/0 is on the J4 connector:
| 3.3V_OUT |
| UART_RX0 |
| UART_TX0 |
| GND |
3.3V_OUT is next to the label J4 for the connector which is the closest pin to the word ASUS printed on the board. Transmit (UART_TX0) was confirmed with an oscilloscope. Transmit was also connected to Receive (UART_RX0) and data was read back to ensure it was actual the receive pin. Data can be written to tts/1, but the pins have not been identified.
These serial ports use CMOS levels. You need an additional voltage converter to get a standard serial port. The parameters are 115200 baud and 8-n-1.
While connect serial to V2, the VCC pin is not needed. TX from serial converter to the UART_RX0 pin, RX from serial converter to the UART_TX0 pin. Here’s the boot log while running /backfire/10.03.1/brcm47xx/openwrt-brcm47xx-squashfs.trx
Buttons
The ASUS WL-500g Premium has two buttons. They are RESTORE and EZSETUP. The buttons can be used with hotplug events. E. g. [#wifitoggle WiFi toggle].
| BUTTON | Event |
|---|---|
| RESTORE | reset |
| EZSETUP | ses |
Note: In Chaos Calmer 15.05 EZSETUP button triggers the “wps” hotplug event.
ACTION: released or pressed
Replacing the Wireless miniPCI Card
Note: This applies to v1 models only!
In order to replace the Broadcom controller with an Atheros one, open the case (instructions above), carefully disconnect the antenna cable from the card, press out the two latches on the sides, and pull the card out of the socket. In some cases the card is glued to a supporting sponge on the main board, so you might have to apply a certain measure of force to get it out. Re-assemble the case, and install packages kmod-madwifi and hostapd-mini to get the new wireless controller to work. Change your /etc/config/wireless to include the following:
| config ‘wifi-device’ ‘wifi0’ option ‘type’ ‘atheros’ config ‘wifi-iface’ option ‘device’ ‘wifi0 ‘ |
Go here for more info and an example configuration.
After installation of kmod-madwifi package you can automatically generate a standard /etc/config/wireless file for Atheros:
Specific Configuration
Interfaces
The default network configuration is:
| Interface Name | Description | Default configuration |
|---|---|---|
| br-lan | LAN & WiFi | 192.168.1.1/24 |
| vlan0 | LAN ports (1 to 4) | |
| vlan1 | WAN port | DHCP |
| wl0/ath0 | WiFi | Disabled by default |
Note about wireless modes
client mode: attitude_adjustment 12.09 (final)
For example this works as wifi client:
Switch Ports (for VLANs)
Please note that the link between the physical ports and switch ports is different for v1 and v2 routers (see table below).
| Port | Switch port (v1) | Switch port (v2) |
|---|---|---|
| Internet (WAN ) | 0 | 4 |
| LAN 1 | 1 | 3 |
| LAN 2 | 2 | 2 |
| LAN 3 | 3 | 1 |
| LAN 4 | 4 | 0 |
| Internal connection | 5 | 5 |
5 is the internal connection to the router itself. Don’t be fooled: Port 1 on the v2 unit is number 3 when configuring VLANs. vlan0 = eth0.0, vlan1 = eth0.1 and so on. For v1 unit, WAN is switch port 0. LAN ports are switch ports 1,2,3,4. And LAN ports map exactly to switch ports.
Example configuration, every port "autonomous"
Failsafe mode
If you forgot your password, broken one of the startup scripts, firewalled yourself or corrupted the JFFS2 partition, you can get back in by using OpenWrt’s failsafe mode.
Boot into failsafe mode
Enabling all RAM
On newer ASUS WL-500g Premium router’s all RAM is enabled by default. If you look at “dmesg | grep Memory” command’s output, you will probably see that there’s only 16MiB of RAM. Specs says there should be 32MiB. To enable 32MiB change the sdram_init and sdram_ncdl NVRAM variables as showed:
Basic configuration
Since this part is identical for all devices, see Basic configuration.
Connect stuff to the USB port
To connect stuff to the USB port, please see Connect stuff to the USB port, the package kmod-usb2 is needed. For some devices the package kmod-usb-uhci-iv might also be needed.
An experience: pivot overlay
Action did to let the system see a 4GB usb stick, plus pivot overlay.
Hardware Mods
Most mods are possible for WL500GP v1 only, because WL500GP v2 uses different SoC and this SoC got most features (wi-fi radio, usb) integraded, making V2 much less interesting in terms of modding. On other hand V1 gives plenty room for hardware upgrades and modding.
Overclock
Warning!
Entering wrong values can BRICK your device, making it unbootable!
This instruction is for WL500G Premium V1 (based on BRCM4704 SoC) ONLY. Check it twice!
You’ll need nvram package (included in default images).
To set 300MHz CPU frequency, execute as root the following commands:
This tells boot loader to use 300MHz frequency instead.
Once your device has rebooted, you can check it runs with higher clocks:
Make sure it contains something like:
BogoMIPS : 298.01
(original value close to 264)
Wi-Fi radio replacement
In case of WL500G Premium V1 you can easily replace wi-fi radio with some better wireless card (which should be in MiniPCI form factor), thanks to MiniPCI slot. This way you can get 802.11n support, higher TX power, etc. For high-speed 802.11n cards you’ll usually need to mod case, installing 1 or 2 extra RP-SMA plugs and antennas, usually with u.FL pigtail, because 300Mbps cards usually require 2 or 3 antennas. So you’ll have to get some extra RP-SMA plugs with uFL pigtails. These pigtails are quite common in shops selling wireless equipment and only cost some few bucks. Installation depends on card and number of antennas. At very least, Atheros-based cards supported by ath9k driver are known to work with WL500G Premium V1. You may need to install extra kernel modules, because default image not supposes WL500GP boots with Atheros card. While 500GP CPU is weak and would not allow routing at full speed of 300Mbps card, wireless performance improvement over .g is noteworthy anyway.
TODO: add pictures with example of such mod?
Extra USB ports
Warning!
This mod requires advanced soldering skills and knowledge of electronics. Improper soldering can cause permanent damage to your device.
Under Construction!
This page is currently under construction. You can edit the article to help completing it.
VT6212 USB 2.0 Host Controller IC contains 4 USB 2.0 high-speed ports. In case of WL500G Premium V1, two ports are not soldered (and lack PCB traces). It is possible to get up to 2 extra USB ports, useful for internal devices like built-in HDD. Mod implies soldering D+ and D- lines of USB directly to apropriate VT6212 pins, which is somewhat tricky thanks to TQFP package, so it requires small soldering iron and decent soldering skills. You should also install resistors to adhere USB specs. Example of such mod can be found here on OpenWrt forum. Some photos are published.
128MiB mod
Under Construction!
This page is currently under construction. You can edit the article to help completing it.
WL500GP comes with 2x16MiB SDRAM ICs, giving 32MiB in total. It is possible to find compatible SDRAM ICs up to 64MiB per IC, giving 128MiB total, 4 times more than it comes from factory. This would allow larger conntrack table or would allow running more programs. See thread for more information.
Debricking
For debricking, put the router in the diag mode:
It responds to ping, so you can confirm that it is in diag mode and ready for the tftp by using “ping 192.168.1.1”.
From DD-WRT Wiki
Contents
[edit] Introduction
Thought this would be a good place for ASUS WL-500G Premium v2 specific information similar to what has been added for other router makes and models. It would probably be relevant to merge any existing and future v1 content here if anyone wishes, as the differences are relatively minor.
[edit] Details on version 1
[edit] Clock Timing Bug
See this thread about a clock timing bug that affects this model.
[edit] Radio Activity LED Bug
See this thread about a bug regarding the "wifi activity" LED.
[edit] Observations
At its heart, the ASUS WL500PV2 is your basic Broadcom-based, Wireless 802.11g router. It sports a modern veneer of white and silver colored plastic. The length and width dimensions are slightly larger than your typical Linksys router. The status lights on the front are lit with orange LEDs. It is silent, passively cooled with plenty of ventilation holes along the top and bottom surface. The orange LEDs shine through the holes, but are only noticeable in dark lighting conditions. The AC adapter is fairly slim and does not hog up multiple spots on a standard power strip.
It offers several advantages over more popular G routers like the venerable Linksys WRT54GL. The most predominant advantage is the 8MB flash and 32MB of SDRAM, allowing DD-WRT Mega builds and plenty of resources for increased IP connections, ipkg installs, JFFS2 partitions, etc. The dual USB 2.0 ports allow USB printers and storage devices to be connected, and the 240MHz BCM5354 is faster than the 200MHz BCM5352 found in the WRT54GL.
One drawback of this router is the single antenna pole. It may be the case that dual antennas is just an illusion of signal range, I cannot say for sure. Also, no overclocking support in DD-WRT as of v24 SP1 and no integrated GigE switch.
[edit] Device Photos
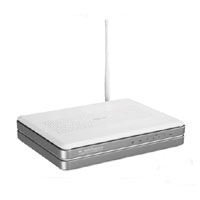

[edit] Hardware
- Platform: Broadcom MIPS
- CPU: Broadcom BCM5454 at 240 MHz (130nm construction) Technical Overview
- NOT overclockable in DD-WRT as of v24 SP2 Build 12874
- /proc/cpuinfo output
- Flash: 8 MB NAND, single chip
- System Memory: 32MB 16-bit DDR SDRAM
- USB: dual USB 2.0 ports
- VIA 4-port USB controller model .
- Antenna: Single, detachable/replaceable antenna
- Network Switch: (4) 10/100 LAN + (1) 10/100 WAN, Auto MDX
- Internal Pic: External Link
[edit] Firmware
[edit] Newest build — tested to work
- 2016-04-11_R29440-dd-wrt.v24_mega_generic —Alvin 16:09, 7 June 2016 (CEST)
[edit] Flashing
The easiest, most reliable method to flash to 3rd party firmware is to use ASUS Firmware Restoration tool that comes on the CD bundled with the product. There is no firmware size limit requiring you to flash dd-wrt mini first; you can go ahead and flash dd-wrt mega right from the start.
When flashing from 3rd party firmware to other 3rd party firmware, just use the firmware upgrade utility in the web GUI. This applies to 3rd party firmwares that include a web GUI, as not all of them do so.
The ASUS Firmware Restoration Utility comes with the CD-ROM included with the device and by default installs to
- WinXP / Vista 32-bit C:Program FilesASUSWL-500gP V2 Wireless Router UtilitiesRescue.exe
- Vista 64-bit C:Program Files (x86)ASUSWL-500gP V2 Wireless Router UtilitiesRescue.exe
[edit] Flash using recovery method
To flash using the "recovery" method, do the following.
1) Unplug the router
2) Press and hold the black restore button and plug in power.
3) Keep holding the restore switch until the power light starts to blink on and off.
3a) The router is now in recovery mode
4) Change the ip settings on your computer to:
4a) IP: 192.168.1.xxx(use anything above 1, I like 100)
4b) Subnet: 255.255.255.0
4c) Gateway: 192.168.1.1
5) Run the recovery program and point it to your .bin file of choice
6) Hit the "upload" button and wait about 2 minutes.
7) Change your IP settings back to DHCP and let it get an address
8) Open a web browser and go to http://192.168.1.1 and have fun!
[edit] Updated ‘out of the box’ TFTP method
Very easy process to flash a WL-500gP v2 out of the box straight to dd-wrt.
You will need 2 files for this procedure (with an optional third for Windows users).
This first file will be used for the initial flash:-
[1] Asus initial dd-wrt NEWD flash mini
The second will be used to upgrade from the initial mini build, adding USB support:-
[2] 14853 NEWD Eko BIG
This last file is an optional program for Windows. Those that do not know command line TFTP well enough should use this:-
[3] Easy utility for Windows TFTP
1) Power up router for at least 2 minutes.
2) Once router is fully powered up, unplug the power.
3) Set the computer to a static IP 192.168.1.6 then plug in lan cable into port 1
4) Press and hold the restore button (the black button, not the red EzSetup button)
5) Plug power back in with restore button held for 30 seconds, then release.
6) This will put the router in TFTP mode with the power led blinking. Set the tftp.exe Server to 192.168.1.1 and leave password blank then select the dd-wrt.v24-13491_NEWD_mini_asus.trx
7) Use tftp.exe to then flash the 13491 NEWD mini, after success wait 5 minutes, then unplug power
8) Plug power in and go to http://192.168.1.1 set a user/password
9) Once in go to Administration > Firmware Upgrade and select the dd-wrt.v24-14853_NEWD_big.bin
10) When file has been selected, set "After flashing, reset to" Default settings then Upgrade.
11) Wait till upgrade is complete and webgui is once again shown. Then set a user/password.
12) Once you have set a user/password make no other settings and close the web browser.
13) Telnet should be enabled by default, so telnet in at 192.168.1.1 with User:root Password:Whatever_You_set_it_to_in_the_webgui
14) When you get to the command prompt issue 2 commands
15) This will hard reset your router, wait 2-3 minutes then re-access webgui at 192.168.1.1
16) Set whatever settings you like and enjoy dd-wrt.
- Also to remember to unset you static ip after flashing, if you intend on using DHCP
[edit] ASUS stock firmware
Of course this ASUS device works with the latest ASUS firmware. Patching to the latest ASUS firmware provides a notable improvement over earlier versions, even those shipping as of Oct 2008. The interface has undergone a cosmetic makeover and provides a straightforward GUI to easily set up shared printers, shared storage, Samba file serving with user credentials and of course typical router functionality. However, the firmware is unstable and requires a reboot every day or two as functionality seems to randomly break.
[edit] DD-WRT
Here is a useful chart from the DD-WRT Wiki comparing the different builds. Ever wanted to know what you get in mega that you don’t in std? This chart has the answers.
[edit] Micro
DD-WRT micro is not a good fit for the ASUS WL-500G Premium V1/V2 router. While it has an amazing amount of functionality for such a small firmware footprint, you lose out on the SSH server, JFFS2 file system support, ipkg, WDS and more. The embedded Linux does not even have the /proc filesystem enabled, nor is their even /bin/ls available. This makes it just about impossible to add any USB devices.
[edit] Mini
[edit] Standard, Vpn, VoIp
[edit] Mega
Mega is the only build that includes USB support "baked in", although there are non-Mega builds that also include USB support, such as the Eko v24 NEWD mini USB firmware. Which, as you can probably guess by the name, is a mini firmware image with the USB functionality built in. It is also possible to configure USB support on any non-micro v24 (and later) DD-WRT firmware release as long as the proper USB drivers are loaded.
[edit] How To’s
- Using Optware,_the_Right_Way is highly suggested to run with this unit. Which adds printer support, auto USB mounting, and more.
- Here is the DD-WRT Wiki page for USB on ASUS WL500GPV2 Updated 11/5/2009
- Here is a short guide on configuring a basic USB printer and USB flash drive to make use of the dual USB 2.0 ports on this router.
- Here is the generic DD-WRT Wiki page on Printer Sharing
- Here is the generic DD-WRT Wiki page on USB storage
This unit also has VLAN Support which the Switched Ports page provides some examples.


